Automate Tab
This is for more advanced users. You use the Automate tab when you want
something to happen when you pull the trigger. It could be that the
student is taken to the next test when s/he finished the first test. It
could be that the next unit folder is unlocked when s/he finishes this
test. Maybe you want to redirect the student to a website that has
peaceful vibes after you've beaten the student with your test for the
last hour. This is where you set those actions.
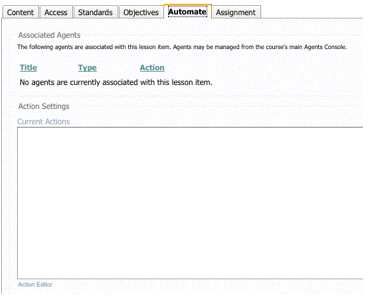
I don't use it, but here's an explanation. There are two parts. From
what I can tell the "Associated Agents" (the top part of the screen)
take precedence over the "Action Settings" (the lower part of the
screen).
Associated Agents. The manual says that you need to go
to "the course's main Agents Console." That's the Automate tab on the
main menubar. When you click on that tab, you'll be in the Agents
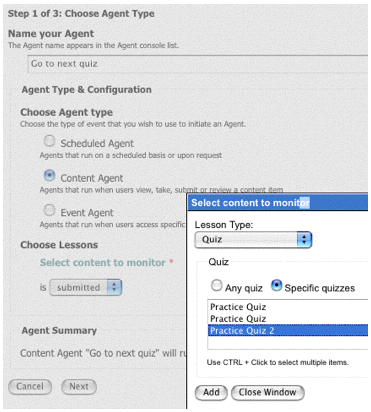
Console. Click Add New Agent and follow a template that will build the
event for you. It's still pretty tough, but it's manageable. I've
clicked Add New Agent and have filled in some stuff. What I want to
happen is that when the student has finished a quiz, s/he will be taken
to the next quiz. The trick comes at "Select content to monitor." (It's
a blue link.) I've clicked that and it's open for you. The drop-down
box default is Assessment, so don't let that scare you. Click on the
drop-down to find what you need. On this page I'm identifying the quiz
that will trigger the action.
Click on Next. Now I'm at the second step. I didn't touch anything on
this page. Notice that as you're building the action, there's a summary
statement at the bottom of the page for you to make sure that what
you've told the template is what you want. 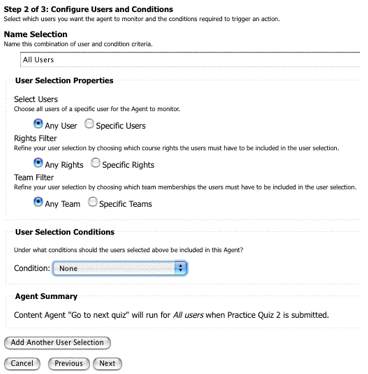
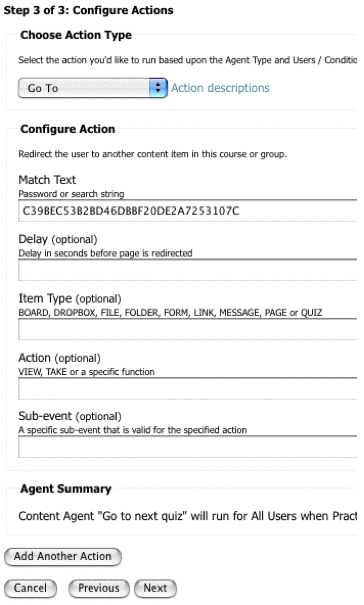
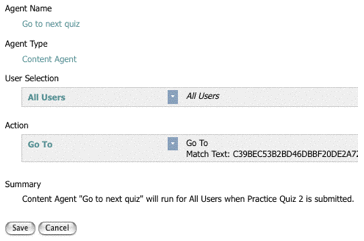
Click Next. Now I'm at Step 3, and this is where I set up what I
want to happen. The student is taking my quiz. When s/he submits it, I
want the computer to take him/her to the next quiz. That's where you
have to put something in the Match Text field. This is going to make
you mad, but before you start the template to build an action, you've
got to go to the quiz that the student will be going to and
control-click on the test (right-click on a PC) and drag down to "Copy
Link Location" (Make Shortcut on a PC) and release. The location is
stored in memory. Here's an example:
https://wtclass.wtamu.edu/section/content/default.asp?WCI=pgDisplay&WCU=CRSCNT&ENTRY_ID=C39BEC53B2BD46DBBF20DE2A7253107C
(Another way to get this number is to go to the Manage tab. Under Data
Management, click on the Course Files Manager. When the next window
opens, click on the _assoc folder. It's the ID number that you need to
copy into memory. When you paste into the Match Text field, you won't
have to erase anything.)
Restart your template. Do Step 1. Do Step 2. When you get to Step
3, put your cursor in the Match Text field and paste your memory into
that field. You have to delete everything but the last string of
alpha/numerical gibberish as I did below. Click Next.
And here's Step 4. If you're satisfied with what you've done! Click
Save.
And now I have an action in the Automate tab of my quiz.
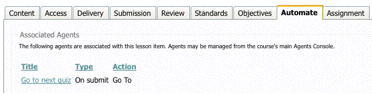
You'll see that there is a Type and an Action. Below are the choices
for each.
Type
One Time – Agent will run once
On View – Agent will run once a selected item is
viewed by a user
On Review – Agent will run when the selected item is
reviewed
On Grade – Agent will run when item is graded
On Submit – Agent will run when item is submitted
On Take – Agent will run when a quiz, survey, or
assessment is taken
Enter Course – Agent runs when a user enters the
course
Exit Course – Agent runs when a user exits the course
Send Course Mail – Agent will run when an email is
sent
N/A – no Type applicable
Agent
Add Variable – Add the specified value to an existing
variable.
Alert – Add a JavaScript pop-up message.
Announcement – Add an announcement to a user's course
announcements.
Calendar – Add an event to a user's calendar.
Email (External) – Send a message to an Internet email
recipient.
Go To – Redirect the user to another content item in
this course or group.
Grade Assignment – Post a grade to the gradebook.
Lock – Lock content that may have been previously
released.
Mail (Internal) – Send a course/group mail message to
a user.
Message – Add an HTML formatted message to the page.
Milestone Completion – Mark a manually marked
milestone as complete.
Redirect – Redirect the user to another Web page.
Replace Variable Text – Replaces Find text with
Replace text in specified variable.
Set Variable – Sets a course environment variable.
Task – Create a personal task.
Task Completion – Mark a personal task item as
complete.
Team Enroll - Enroll the user in one or more teams.
Team Unenroll - Unenroll the user in one or more
teams.
Unlock - Release password-protected content to the
user.
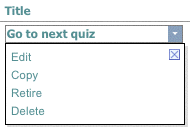
If you find that something isn't right, you have to go back to Automate
tab and click on the arrow to get a drop-down menu.
The other option, which does the same thing, is the Action Settings
area, which is the lower part of the Automate window. You'll need to
click on Action Editor to get things going.
I clicked on New Action and I have these choices.
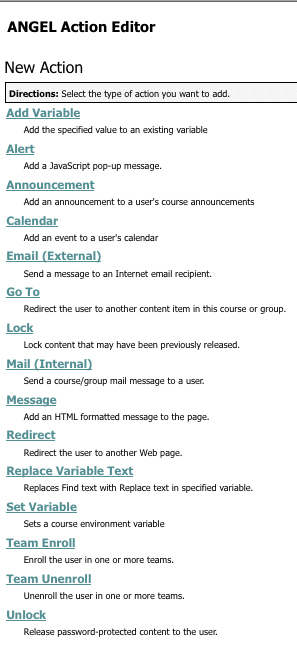
I clicked on "Go to" and it opened this template. I'm going to do the
same thing that I did above just to show you the comparison.
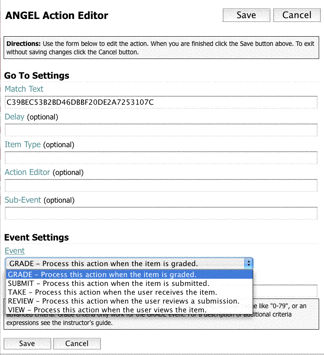
I pasted in the target quiz ID. This time, the student won't be taken
to the next test until the quiz is graded (but I'm using multiple
choice questions for the computer to grade), but it shouldn't take too
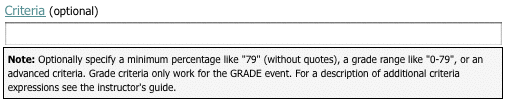
long. Criteria is hidden, but I want this action to take place if the
student has a grade of 60 or higher, so I put 59 in the field. If the
student fails, s/he won't be going to the next quiz.
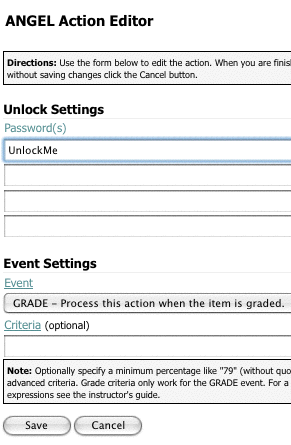
Let's say I also want to unlock a folder when the quiz is submitted. I
clicked on Action Editor, then the Unlock link. Any folder that's
protected by the password "UnlockMe" will be unlocked when the quiz is
viewed.
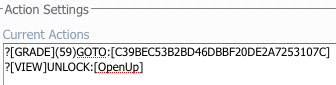
Now I have two events associated with this quiz.
Are there any questions? Seeing none, let's move on to the Assignment tab or you can go to the Index page.